26 Epic Tips For an Outdoor Kitchen Patio [Ideas + Pictures]

Thinking of putting an outdoor kitchen on your patio? An outdoor kitchen patio has plenty of advantages and only a few flaws, most of which revolve around the grill.
The patio is the most convenient and usually most budget-friendly location for an outdoor kitchen. It often comes with ready-to-use flooring, covering, and access to utilities.
A variety of sizes and plans are available, too: the most common are:
- island
- L-shaped
- galley
This is nice and all, but what if your patio is too small or you need a very precise design to match your set-up? That’s nothing to say of adding a grill, which could be a hazard if not protected properly.
Let’s dive deeper into the step-by-step process of installing an outdoor kitchen patio. You’ll learn about safety measures, ideal placements, and several epic tips so you can enjoy the ultimate outdoor cooking experience!
12 Simple Steps Of an Outdoor Kitchen Patio Design

Patios are an excellent spot for an outdoor kitchen since they’re such a convenient location. Your house is just a few steps away, so it’s easy to bring stuff in and out.
The roof, floor, and utilities are usually in place, too. This means not only a shorter timeline of the building process, but you need a much smaller budget.
Overall, creating a fully-functional second kitchen on a patio is not only possible, but very affordable.
The 12 steps of designing an outdoor kitchen patio are:
- Draw your outdoor kitchen area in scale
- Choose the space and shape for an outdoor kitchen
- Choose the size of your outdoor kitchen
- Put a grill into your design
- Add other essentials and appliances
- Add storage
- Add lighting/ fans/ electric sockets to your design
- Choose finishes
- Choose the covering (optional)
- Hire a crew (optional)
- Apply for permits (optional)
- Buy all the materials (optional)
- Start the construction
As you can see, creating a functional and safe outdoor kitchen patio requires a bit of planning. Believe me, all the time you spend on it is going to pay off – your ROI could be between 55% to 200%!
Usually, a massive part of the budget goes to professional services – plumbing, electrical, and so on. When you’re in control of the project, you’re able to cut off some of the jobs and shorten the timeframe all at once.
That doesn’t mean you should cut corners, though! It’s important to know each step well, as it makes execution both easier and less expensive.
Under every step below, you’ll find a detailed breakdown with extra tips.
Draw Your Outdoor Kitchen Area in Scale

Step one is drawing out the whole patio area. This step can be made in a digital application or with old-fashioned pen and paper.
The goal is to figure out how much space can be dedicated solely to an outdoor kitchen. The smaller your space, the more precise decisions you have to make. Several things have to be marked, like:
- utilities placement
- doors and windows
- steps
- anything that can’t be replaced
Choose the Space and Shape for an Outdoor Kitchen

Step two of creating an outdoor kitchen patio is picking a space for an outdoor kitchen. The most common outdoor kitchen patio locations are against the house or along the side of the patio.
The main goal of placement is to fit your unique lifestyle – for example, an outdoor kitchen patio that’s too far away can be difficult to use if you have mobility issues.
Another example is having very large windows by your patio and not wanting to lose natural light with a nearby outdoor kitchen.
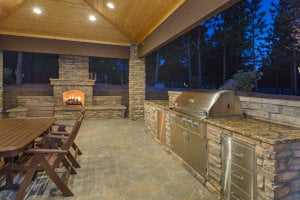
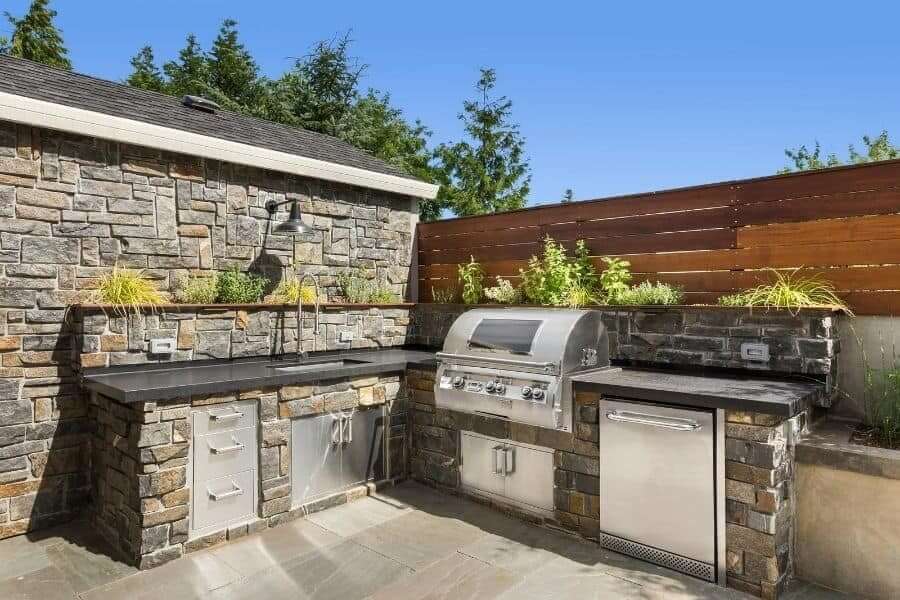
There are plenty of outdoor kitchen shapes that can be used on patio, like:
- L-shaped
- U-shaped
- galley
- island
- along the wall
Need some visual inspiration? Just take a look at this gallery:


Each shape has its advantages. What works great for smaller spaces is an L-shape and an island, as they’re both visually open.
If your space is not limited, you can choose whatever suits your needs and fit the appliances you dream about. The more length your outdoor kitchen has, the more appliances it can fit.
Some shapes work better for specific styles—for example, modern looks best with straight lines delivered by islands and galleys. Traditional is going to look great with U-shape and L-shape.
If your preferred shape is not a top choice for your style, don’t worry. Your finishes, such as countertops or furniture, will still create the aesthetic you’re going for.
While we’re at placing stuff on your patio – make sure you want to actually eat there! A dedicated space for dining is easy when you get complete these first few steps properly.

24″ is a minimum width per person, comfortable personal space is 30″, a luxurious experience should be increased to 36″.
The bar serving counter should be at least 12″ deep, as standard plates are 9″. Tabletop standard is 38″. I also recommend a cantilever to allow knee movement (12″ for bar height, 18″ for countertop height).

Below you’ll find the most common dining table sizes (with the space they’re going to take out of your patio).
| Space size | Table shape | Table size | Number of chairs |
|---|---|---|---|
| 5′ x 9′ | square/ round | 36″ | 2 |
| 9′ x 9′ | square | 40″ | 4 |
| 9,5′ x 9,5′ | round | 42″ | 4 |
| 9,5″ x 11′ | oval | 42″x60″ | 6 |
| 10′ x 10′ | round | 48″ | 6 |
| 11′ x 11′ | square/ round | 60″ | 8 |
| 9,5′ x 14,5′ | ractangular | 42″x100″ | 10 |
As you can see, a table with chairs takes quite a lot of patio space. Knowing the spacing may help you with picking table shape and size.
If the number of seats makes you unhappy, there is a solution for that as well. An extendable table is a great option when you have some dining space on your patio, but just not enough.
But what if your space is so limited, you can’t put a dining set outside? Or, occasionally, you host big gatherings that one table won’t be able to accommodate? Let’s take a look at the next tip to figure this out.
Choose the Size of Your Outdoor Kitchen
An outdoor kitchen patio should be a size that makes sense for your appliances. For example, if you’re only going to use it from time to time, there is less sense in adding a sink or refrigerator to the construction.
On the other hand, if your outdoor space is going to be used daily, spending extra cash on more length and appliances might be a good idea.
How to figure out what you actually need?
There are basically three outdoor kitchen sizes: small, medium, and large.
| Size name | Total length | Includes |
|---|---|---|
| Small | 10′ | grill, cooktop, sink, storage |
| Medium | 16′ | grill, cooktop, sink, storage, refrigerator |
| Large | 20’+ | grill, cooktop, sink, storage, refrigerator + |
A patio is an amazing spot for an outdoor kitchen, as even a small design works fine. An indoor kitchen is usually close enough to omit a refrigerator in a small outdoor kitchen design – more than enough for family gatherings or inviting friends over.
A medium outdoor kitchen, which is a fully-functional package, will fit most people’s dreams. It fits all the essentials with lots of countertop space.
If you need a spot for more than one chef at a time, a large outdoor kitchen size is for you. 20’+ is enough to fit basically anything you need – from a pizza oven to an Argentinian grill.
Check out my guide if you want to get down and dirty with more outdoor kitchen dimensions for dining areas, countertops, and more.
Put a Grill Into Your Design
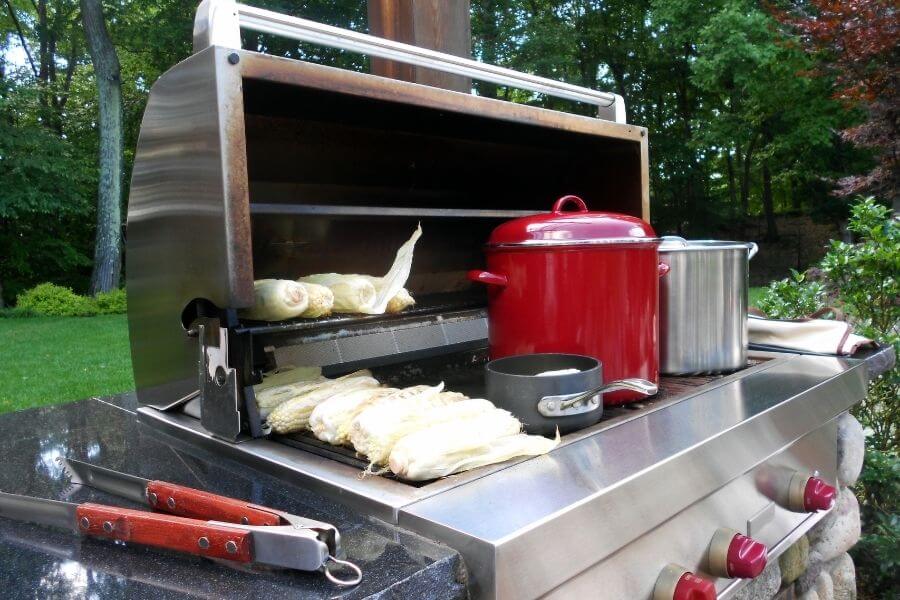
Placing a grill in the design is a crucial detail that requires a little knowledge to pull off. First of all, grills placed under the roof usually require installing a vent hood.
The goal is not only to reduce the amount of smoke, but to reduce fire hazards. Basically, when the fire starts, a vent hood immediately controls it.
Second of all, grilling produces smoke. Even the best vent hood is not going to take all of it in. This smoke can not only irritate you and your guests but also get into your house.
Before you put a grill on your patio, figure out the direction of the wind in your backyard. How much wind your patio receives can be influenced by the thickness of trees (which block wind) or how spacious your backyard is (more windy).
While we’re at a grill, it is time to decide which model you’re going for. If you’re not sure what you need, read my guide about outdoor kitchen essentials.
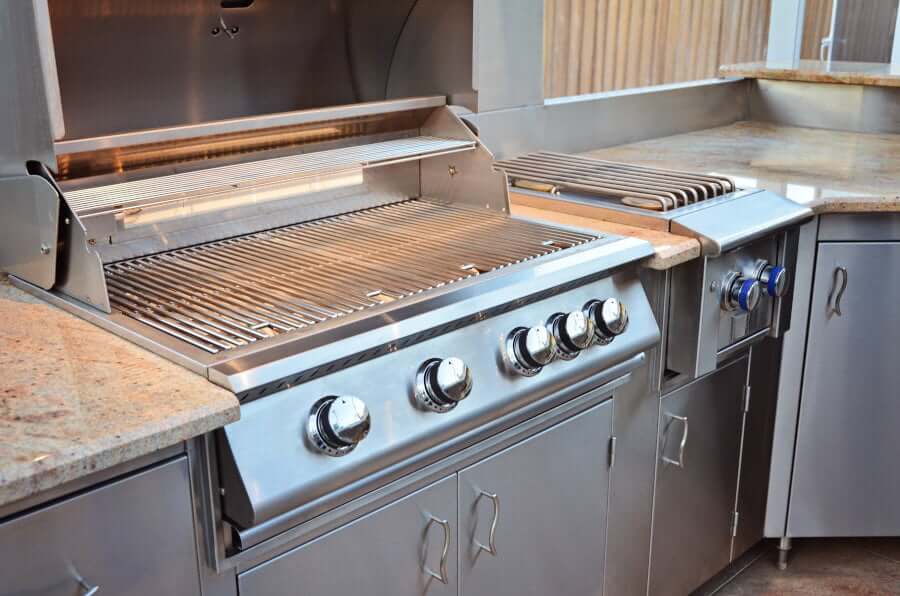
If you have a specific model in mind, scale your design and add landing space on both sides of a grill. Landing space is a part of a countertop dedicated to a specific appliance.
Outback Landscape cites improper kitchen and patio sizes as one of the most common design mistakes homeowners make. Follow these design rules from the very beginning and you won’t end up with an incompatible outdoor kitchen patio.
Add Other Essentials and Appliances

Now that you’ve figured out your grill specs, you might be wondering what else should be installed in your outdoor kitchen patio.
Picking everything you need is the first step of this process. The next step is placing all the appliances in zones.
There are 5 outdoor kitchen zones:
- hot
- dry
- wet
- cold
- serving
A hot zone is an area where cooking appliances are based, so grill and burners, smoker, pizza oven, etc.
A dry zone is a countertop space with storage. This is useful for storing everything from food to silverware.
A wet zone is where the sink is based. Useful appliances here are dishracks and towels.
A cold zone is an area for the refrigerator. You can also have an ice tray or wine cooler here.
A serving zone is where people eat. You’ll need tables, chairs, and comfortable accessories like seat pillows or bug zappers for summer.
If your space is not very limited, it’s worth adding other zones. There are multiple rules, though, that should be followed. Not every zone can be placed next to each other.
Next to a hot zone is a dry zone. This is a place where countertop space is crucial. It usually has a hot zone on one side and a wet zone on the other.
A wet zone needs access to water. If you have a water connection on your plan, it would be super useful to place a wet zone close to it (and save your contractors some work).
The reason for placing the refrigerator close to the wet zone is because food taken out of it often needs washing.
The next step of adding appliances to your plan is adding landing spaces on both sides of your appliances. A landing space is a countertop space you dedicate to each appliance.
Omitting this spacing in your design is a terrible idea and a common reason for outdoor kitchen remodel. If you need help figuring out how to space everything out evenly, check out the standardized numbers below:
| Appliance | Landing space |
|---|---|
| Grill | 24″ on one side, 12″ on the the other |
| Cooktop | 12″ on both sides |
| Sink | 18″ on both sides |
| Pizza oven | 24″ on one side, 12″ on the other |
| Keg | 12″ on both sides |
| Under-counter fridge | 15″ of open counter above |
So the minimal space between the cooktop and a sink is not 30″ (12″+18″), but 27″ (18″x1,5). So each time you add an appliance, you also add countertop space on the sides of it.
Add Storage to Outdoor Kitchen on a Patio

Let’s get back to the dry zone for a minute. Storage is actually one of the outdoor kitchen essentials and there are so many options you can use!
The first option are cabinets. There are plenty of things to store in them, from pans and pots to fire blankets. Since these cabinets will be exposed to all sorts of outdoor hazards like moisture, sunlight, and insects, you need materials that will hold up.
You have many options to choose from, such as stainless steel cabinets or waterproof HDPE cabinets.
Drawers. We love them inside, as it is so much easier to keep them clean and organized. Drawers are usually better-utilized spaces, as you can easily grab stuff from the back.
You can also try marinating and warming drawers for complex recipes.
Add Lighting/ Fans/ Electric Sockets to Your Design
That is a subject I personally love. Lighting is an amazing way to transform your outdoor kitchen patio into something new.
There are three strategies. The first is simple, and its goal is to illuminate spaces so you can use them safely. The standard lighting strategy is simple + supplemental lighting.
Sophisticated is taking standard to another level – producing a unique effect.
There are basically three lighting types: ambient, task, and accent.
The ambient lights’ goal is to illuminate the whole area. Fixtures that help with that are a fan with light fixtures, chandeliers, string lights, sconces, recessed lights.
Task lighting is where work takes place. It will usually be above a countertop in your outdoor kitchen patio, but it depends on the specific design. Fixtures that can be used to achieve this goal are scones, recessed lights, grill lights, above countertop lighting, and pendant.
Accent lights’ goal is to stress the specific element of the area. It can be a wall structure, art, or a plant. Fixtures that can help with the subject are pendants, track lights, light strings, and landscape lights.
If you want to use lighting to enhance your outdoor kitchen style, check out my outdoor kitchen lighting design tips.

A dimmer is an essential feature on the outdoor kitchen patio. It allows your body to start unwinding and getting ready to rest. The later it gets, the less intense your light should be.
(or if you want to make your guest eat quickly and leave, make it shine the brightest it can!)
As I mentioned before, the fan is the ultimate fixture for an outdoor kitchen. Depending on the space you work with, the size and number of fans can vary.
| Space size | Fan size |
|---|---|
| up to 75 sq ft | 29 – 36 in |
| 76 – 144 sq ft | 36-42 in |
| 144 – 225 sq ft | 44 in |
| 225 – 400 sq ft | 50-54 in |
If you’re not sure if it will winterize well, you can always use a portable one.
Last but not least, the thing is to add sockets to your design. If you’re really going to cook outside, a blender or other powered by an electricity tool may come in handy!
Choose Finishes for an Outdoor Kitchen Patio
Close to house location makes picking finishes for your outdoor kitchen patio much easier, as your choices are limited. Your outdoor kitchen design has to correspond with the house exterior well, both with the color scheme and materials.
Another thing to remember is the backyard neighborhood. Going with natural materials that look well with plants is easy to pull off and blends everything together visually.
Recommended materials for outdoor kitchens are:
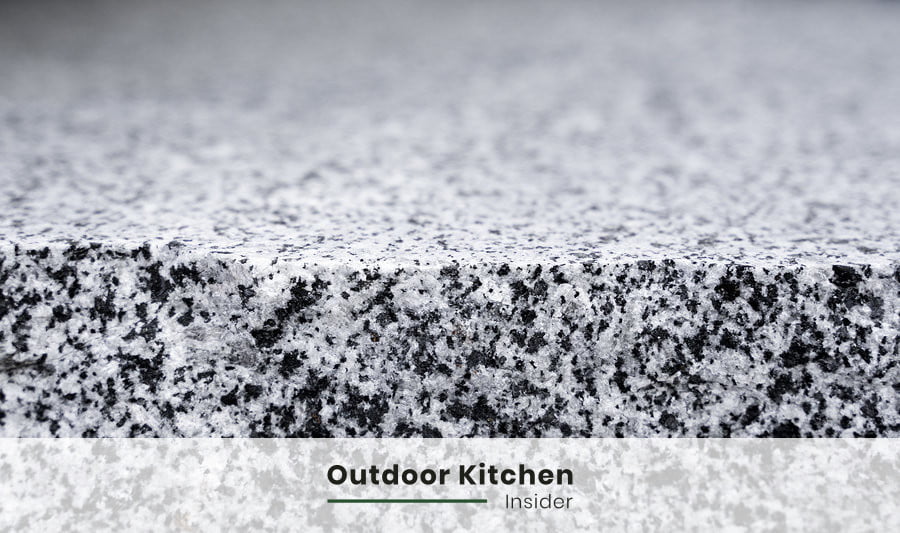
- granite/ quartzite for countertops and facade
- 304-grade stainless steel for appliances, cabinets, drawers
- bricks
- exotic wood
- concrete (works best for mild winters locations)
- outdoor rated tiles
If you only have a chance, it is worth performing. From the results, you’ll know how often your countertop needs to be sealed.
The type of materials are incredibly importance since they increase your outdoor kitchen’s longevity – they could mean the difference between a set-up that lasts one decade or five decades.
So does another factor: covering.
Choose the Covering for an Outdoor Kitchen Patio

An outdoor kitchen patio can be covered in multiple ways – if you’re lucky, you already have a roof over your head and you don’t have to use your budget for the enclosure.
If not, there are multiple ways to cover an outdoor kitchen patio, like:
- umbrella
- sail shade
- pergola
- gazebo
- roof

The umbrella and sail shade are non-permanent solutions that are excellent for dining and entertaining, but not so much for the cooking section of an outdoor kitchen.
They stain easily and are also a fire hazard. Their biggest advantage is being used when needed – so even if they cut off a bit of light during usage, they can be folded and put away again.
A pergola is an amazing solution for an outdoor kitchen – it doesn’t cut off as much light as the roof and gazebo do, but also provides some shade. Pergolas work great on patios. It doesn’t really matter if your outdoor kitchen patio is located next to the house or has some distance.
With a canopy, it provides excellent protection from the sun. In general, it’s the best solution for climates that don’t experience a lot of rain and snow.
A gazebo is a solution that works well for an outdoor kitchen patio located some distance from the house. The great advantage is protection from elements – sun, rain, and snow. Gazebos come in a huge variety of styles, so it’s easy to build one resembling your house.

Adding a roof over the patio is quite an expensive project (on average $7,000 – $11,000). However, you get a very functional space.
The roof protects an outdoor kitchen from the elements very well. When using a roof in design, it is crucial to take extra care about safety (installing a vent hood over a grill is a must).
Just be mindful it can cut off some parts of the light from your home’s interior.
Hire a Crew for an Outdoor Kitchen Patio

Now let’s talk a bit about finding a proper crew. The first thing to do is by asking around. Check your families’, friends’, and neighbors’ backyards for an outdoor kitchen and ask them if they’re happy with it.
If yes, asking for a contractors’ number is the next step.
If you can’t get any recommendations the old-fashioned way, use the power of the Internet! You can ask for recommendations on your social media – you never know what advice you may get.
If you want to be more private about your project, using a service like Home Advisor. You have to type in data into the survey, like your zip code and desired elements of the project. You’ll get up to 4 free offers from local contractors.
It’s also a good idea to check their rating on Google (type the contractor’s name in, then look for recent and verified user review scores).
Apply for Permits

This is a very important step. If you build an outdoor kitchen on your deck without permits, you may receive a demolition order. Not every outdoor kitchen needs a permit, though!
When do you need a permit? Firstly, when you work with utility lines (gas, plumbing, and/or electrical).
Secondly, when your outdoor kitchen is placed close to property lines (this rule falls under zoning requirements).
You may have to pay up to $500, but your outdoor kitchen patio is going to be legal and safe.
Check out my guide if you want to do more reading on outdoor kitchen decks.
Buy all the materials for your outdoor kitchen

If you’re going to work with a contractor, there is a huge chance they’ll take care of the shopping. If you’re a DIYer, the tips you’ll find below may save you a substantial amount of money (and a lot of nerves).
First of all, start shopping ahead of time. Your shopping list should be ready several weeks before construction.
The best time to shop is in the winter since fewer homeowners are doing projects. Why? Not a lot of people think about grilling at that time of year. Shops still do have appliances they want to sell.
When demand declines, prices go down. A win-win!
Even if you plan to build in the spring, buying equipment or appliances in winter is a good idea (if you have a place to store them).
What can a package include? Cabinets, drawers, grill, refrigerator, burner, and more.
If you decide to buy a stone, look for a seller who will agree to check your slab features, too.
Start the Construction

Congratulations: you’re ready to usher in a new outdoor kitchen patio and a new era of entertaining at your property!
I hope this article helped you in designing your outdoor kitchen on a patio. If you need more tips or ideas to build your kitchen, check out these guides: